
In order for your team to use Expensify with your organization, you’ll need to invite them to your group workspace
Navigate to the Members Area
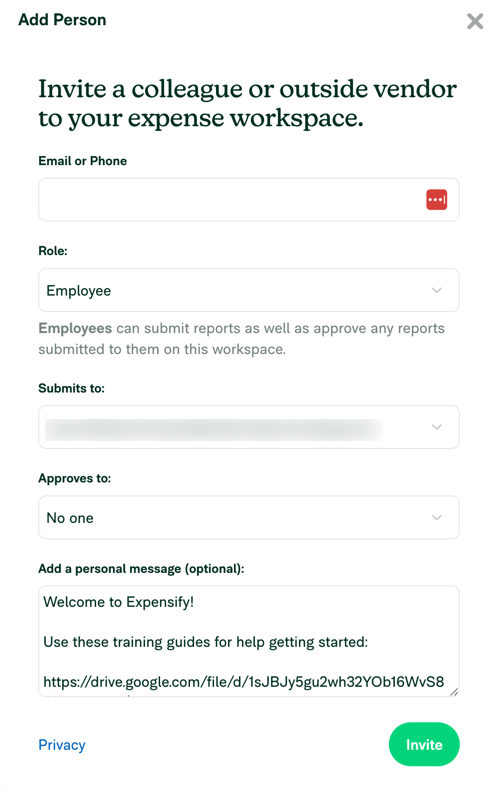
Log in to Expensify and navigate to Settings (gear icon) > Workspaces > [Workspace Name] > Members. Click the Invite button.

On the pop-up window, enter the invitee’s email address (preferably an email address with the company’s domain name)
Select the role
- Employee: You will most commonly use the Employee role to invite anyone who will submit or approve expense reports.
- Auditor: The Auditor role is for someone who you want to be able to view-only all reports on your company’s group policy, such as an auditor
- Workspace Admin: The Workspace Admin role is for someone you want to be able to view all reports and manage the company’s group workspace configuration settings.
Select Submits To
Select the “Submits To” user. This is the person who will approve this new user’s reports
Optional: Select Approves To
If this invitee will approve other people’s expense reports, select the “Approves To” user. Keep this field blank unless this person is going to be an Approver. This field is ONLY used if the new user will be approving other people’s reports. If this new user is an Approver, then select the person who other people’s reports will go to after this new user approves them.
Create Invite Email
Add a custom message to the invite. Consider including helpful links to “Getting Started” training guides. Here’s an example message:
Welcome to Expensify!
Use these training guides for help getting started: https://help.redmondaccounting.com/
Click the green Invite button to send the email invitation to the new user so that they can submit reports under this Workspace using its categories, tags, and configurations.
Leave a Reply