
Link your Expensify account directly to your Uber account so you can auto-forward Uber trips to Expensify
Even if a company has invited staff to its Uber Business Profile, that centrally managed Business Profile cannot be linked to Expensify. These steps help users add a new Business Profile to their personal Uber account to forward ride receipts to their Expensify account.
Add your Expensify Email Address
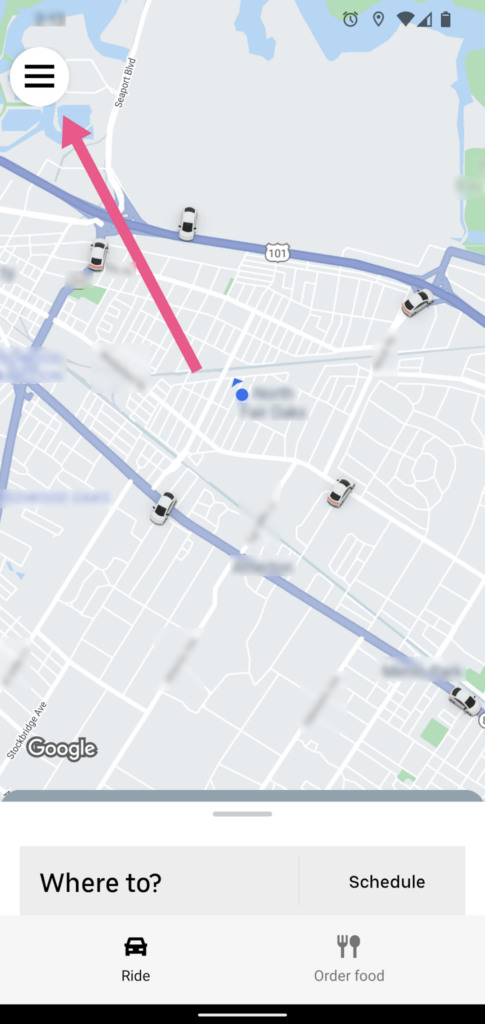
Log in to Uber and tap the three lines in the top-left to open the menu. Then click Wallet.
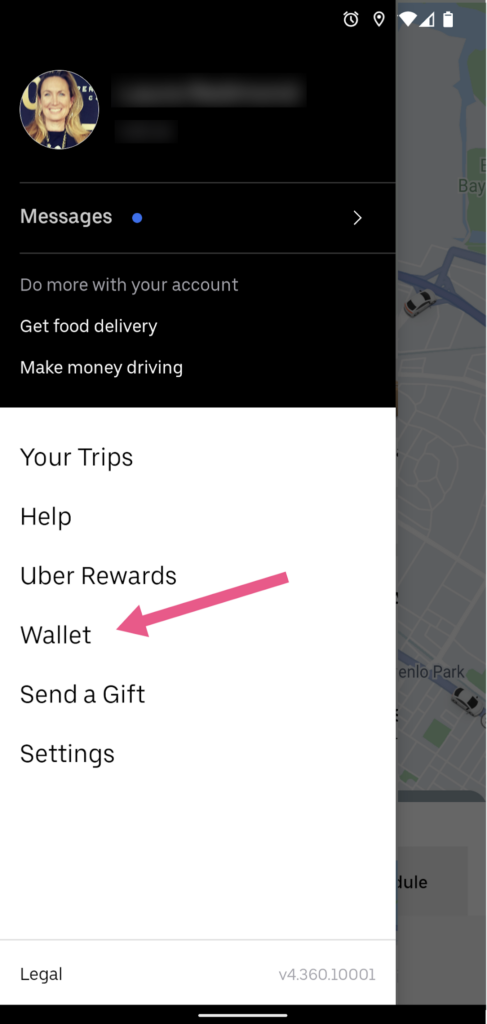
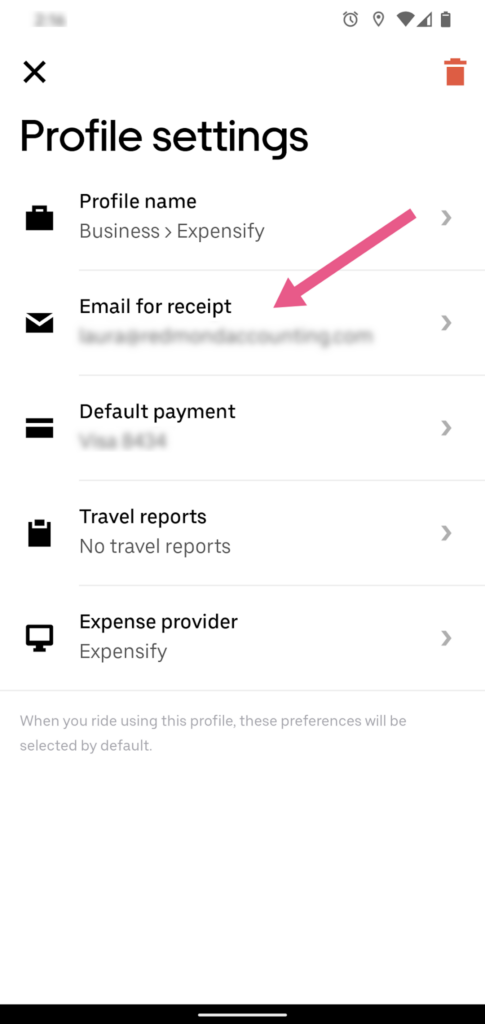
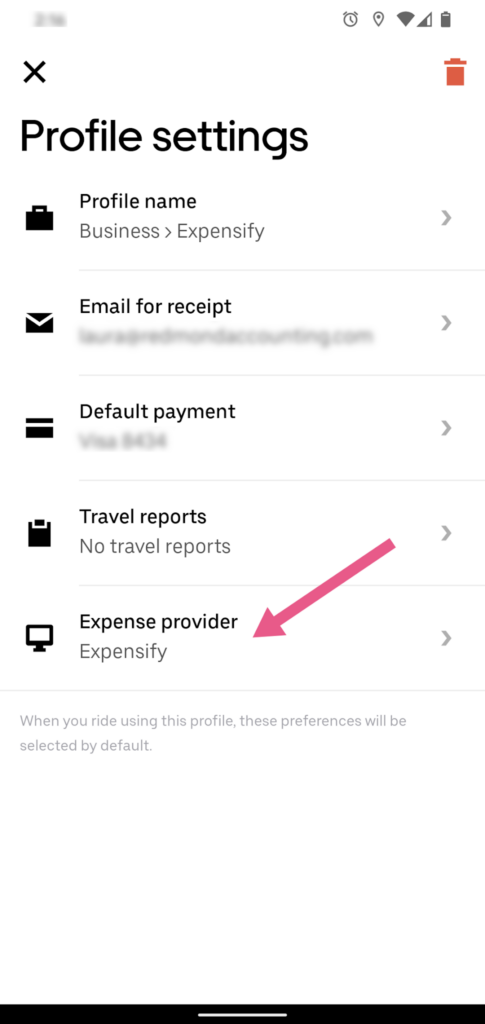
Scroll down to the Ride Profiles section and click Business. Then click the row “Email for receipt” and enter the email address that you use to log in to Expensify. When Uber sends your receipts to Expensify, this is how Expensify knows which user’s account to add the receipt.

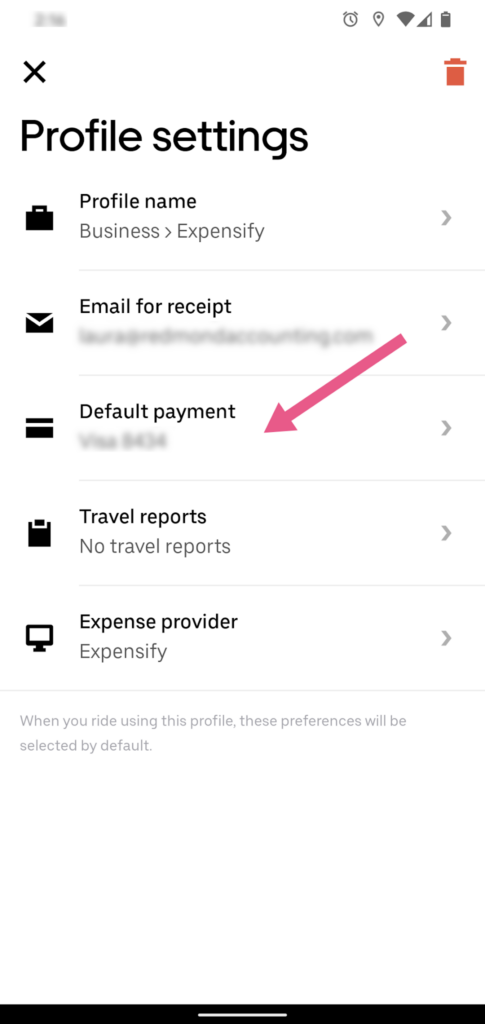
Next, click the “Default payment” row and add your company credit card or other preferred payment info as the payment method you want to use for these business trips.
And finally, click the row “Expense provider” to select Expensify.
Leave a Reply