
Domain control of company cards in Expensify allows you to connect to your credit card’s bank feed and assign each card’s activity to a user.
Connect Credit Card Account
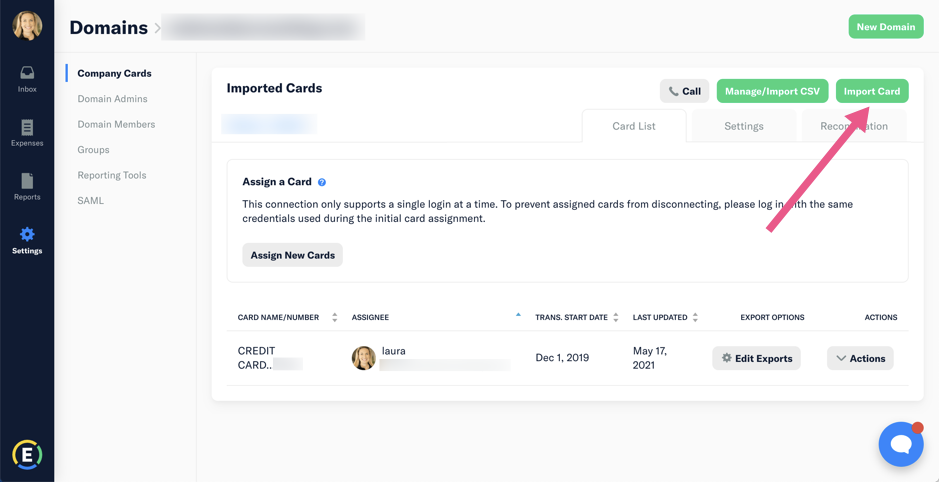
Log in to Expensify and navigate to Settings (gear icon) > Domains > [click domain] > Company Cards
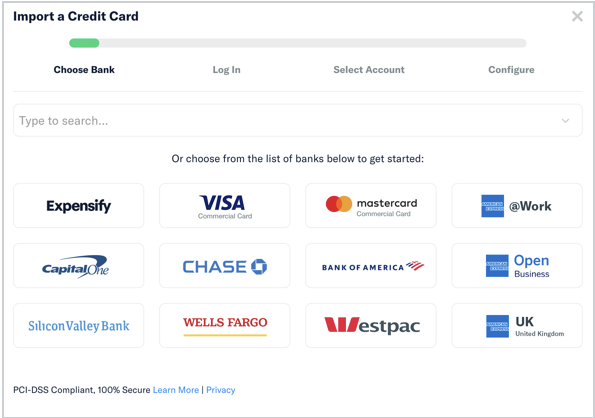
Click the Import Card button and follow instructions to use your credit card online account username & password to connect the card’s bank feed to Expensify.
If you have trouble, note that many financial institutions require that your credit card online account username/password credentials be at the topmost Admin level to connect to 3rd-party apps like Expensify. It depends on the card-issuing financial institution. They each have their own rules!
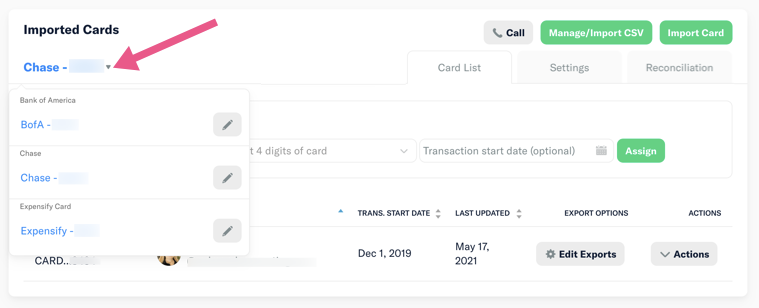
NOTE: If you connect multiple credit card accounts (parent accounts), you can find them by clicking the tiny triangle next to the currently selected account to see a list of other accounts.
Click the pencil icon next to each to update the description/nickname of each credit card account
Assign Cards to Cardholders
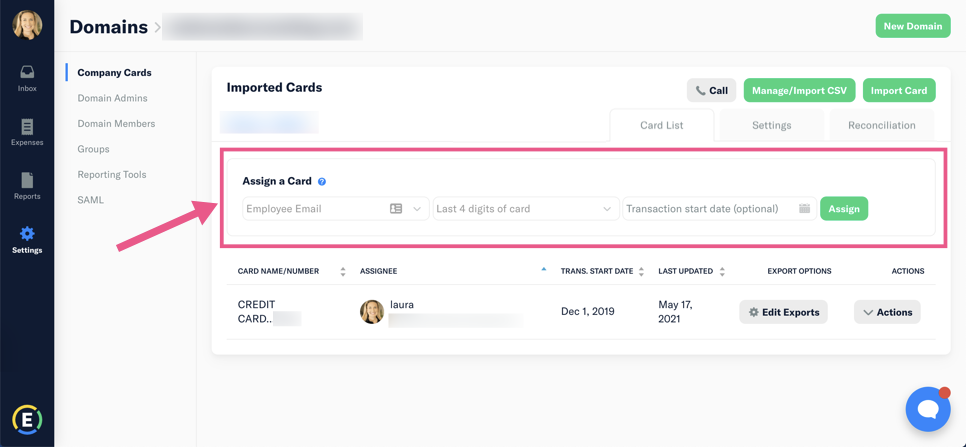
Once the bank feed connection is established, use the “Assign a card” section to assign each credit card to the appropriate cardholder.
- In the first dropdown field (“Employee Email”), select the policy user that you want to assign the card to.
- This user should be the one who collects the receipts, codes the expenses, and submits the reports for this card.
- It may be the cardholder, an accounting person, or the administrative assistant for the cardholder.
- If there will be an assistant, learn about the co-pilot feature and determine whether to assign the card directly here to the helper or have the helper masquerade as the cardholder via the co-pilot functionality.
- If the cardholder will be snapping pics of their receipts using the app, then the helper should co-pilot. If the helper will be assembling the receipts (scanning, emailing, etc.), then the helper should be assigned the card directly.
- In the second dropdown field (“Last 4 digits of card”), select the card that you want to assign to that user.
- The card may not appear in the dropdown list until activity has been posted to the account.
- In the 3rd field (“Transaction start date”), choose the date that you want Expensify to download transactions from that date forward
Once the card has been assigned to a user, it will update daily and appear in the user’s account on the Expenses screen.
Map the Export Account
Once each card is assigned to a user, map each card’s export account
- Click the Edit Exports button (gear icon) on each row for each cardholder
- In the top of the two dropdown fields, choose the QBO credit card liability account where transactions from this card should be exported. The dropdown list will show your QBO Chart of Accounts that was connected in the Policy.
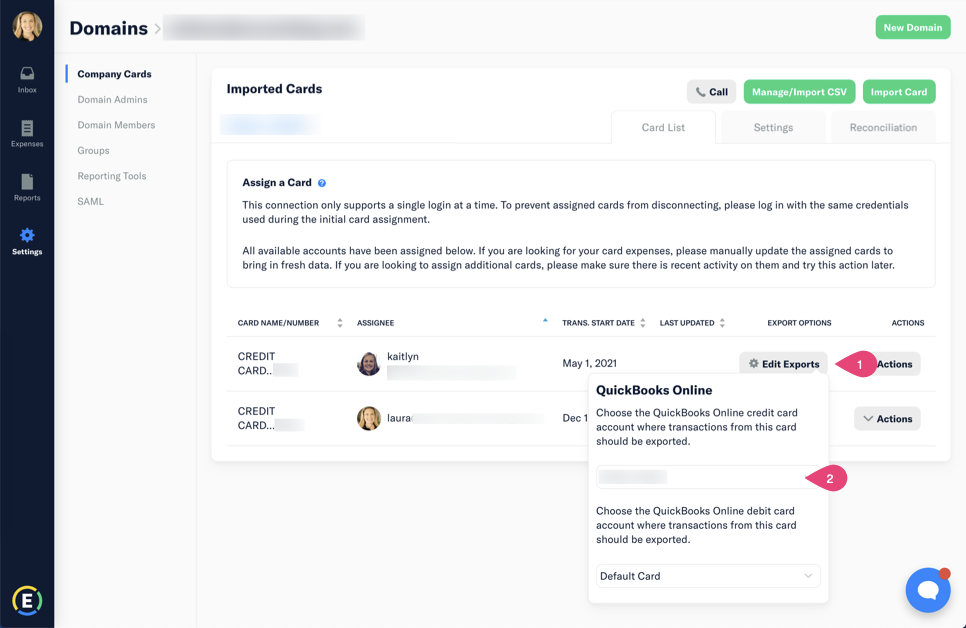
Configure card settings
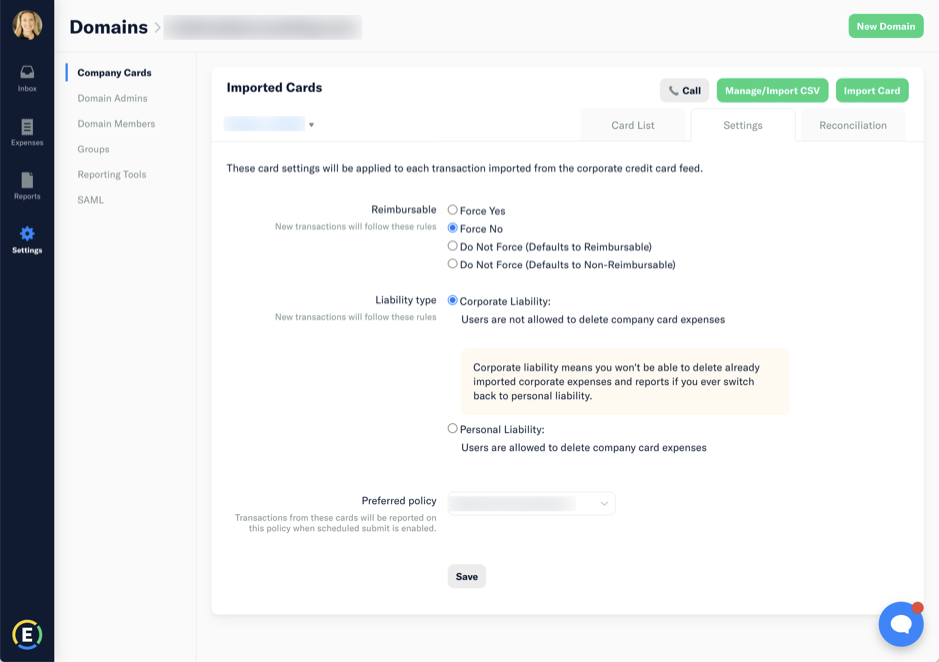
These settings apply to all transactions in the credit card feed associated with this card.
- Select the default reimbursable status. Since these are company credit cards and the company pays the credit card financial institution directly, it is most common that you set this to “Force No“
- Select the liability type in Expensify. Since these are company credit cards and the purchase was charged to the company card, it is most common to set this to “Corporate Liability” so that users cannot delete the downloaded credit card feed. It happened, so someone needs to report on it. Even if that leads to a request for a credit from the merchant.
- Select the organization’s preferred Policy (there is generally only one).
- Click the Save button
Leave a Reply