
Here are the steps for each individual user to link a personal credit card to Expensify to select personal expenses, add them to an expense report, and submit them for reimbursement in Expensify. Purchases made on a personal card will not be viewable by the company until you add them to a report and submit that report to the company for reimbursement.
Connect your Credit Card
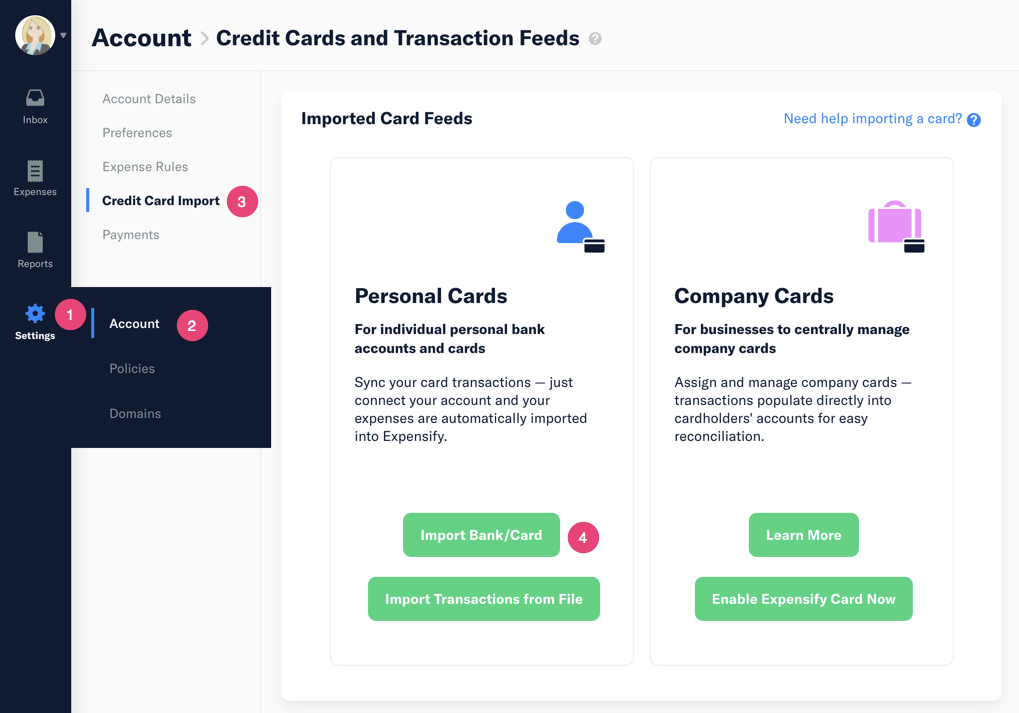
- Log in to Expensify and use the left navigation pane to go to Settings (gear icon) > Account > Credit Card Import. In the Personal Cards section, click the Import Bank/Card button.
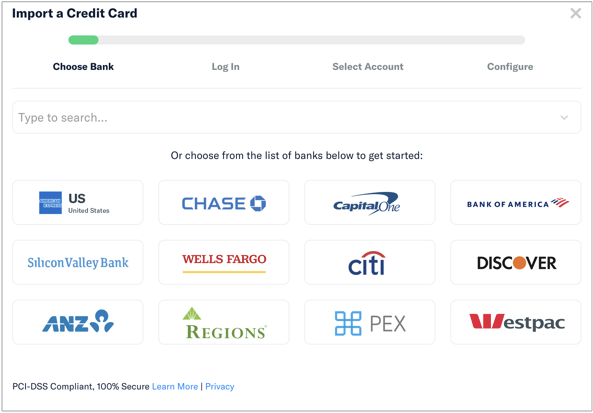
- On the Import a Credit Card pop-up window, use the search bar to find or click the logo to select your financial institution.
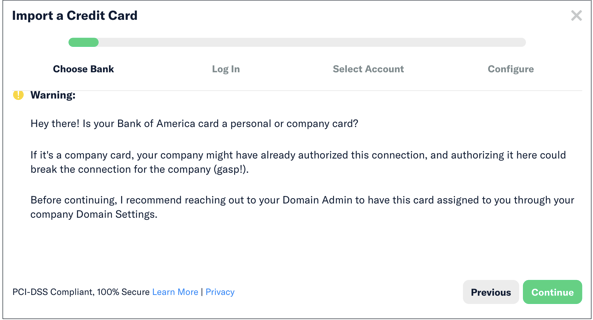
- Notice the warning that only personal cards should be connected here. If you have a company card paid by the company, that card will be connected and managed centrally by the company admin.
Import Transactions
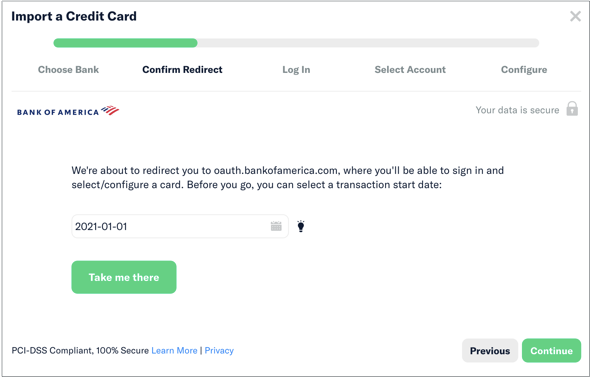
Follow instructions on the Import a Credit Card wizard to connect your account. This will include:
- entering the start date for the earliest personal transaction you want to import into Expensify
- logging in to your account
- verifying your identity for security purposes via text/call code
- consenting to share your financial data with Expensify
- selecting which accounts you want to connect to Expensify
- configuring the card(s) you selected
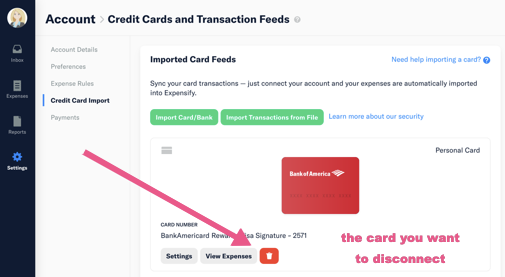
Note: IF the connection wizard skips the step for you to select which accounts you want to connect and automatically connects all accounts at that financial institution, then after you complete the wizard, you can delete the accounts you don’t want to keep connected. Do this by clicking the red Delete button (trash can icon) for each card that you want to disconnect.
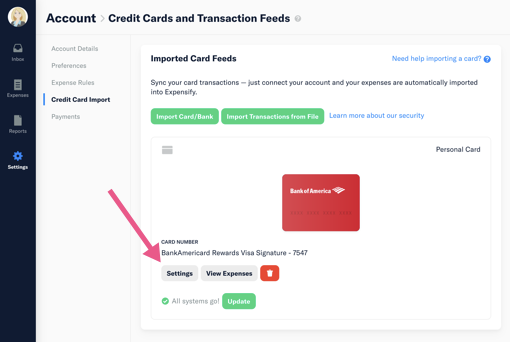
Modify Credit Card Settings
Click the Settings button to modify your credit card settings
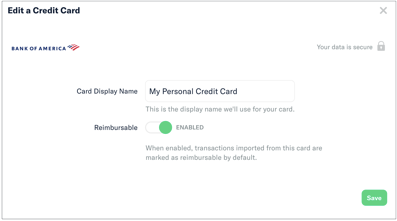
Modify the display name of this card and/or mark these expenses to default as reimbursable
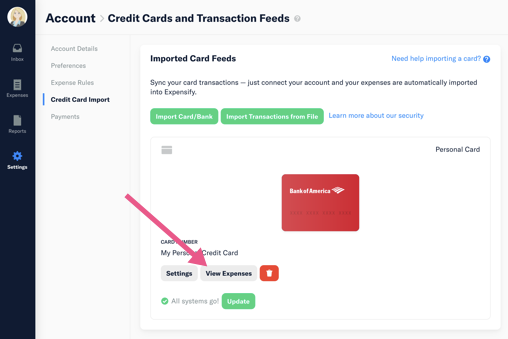
View and Submit Expenses
Click the View Expenses button to go directly to the Expenses screen and view all expenses being imported for that card. From there you can code them, attach receipts, and add them to a report to submit to your company for reimbursement.
NOTE: Remember to update your filter on the Expenses screen if you do not see the expenses you expect. Filter settings are “sticky” and are often still set from the last time you used the Expenses screen.
Leave a Reply