
Introduction
When you use personal funds for business expenses, submit reimbursement requests through Expensify.
- If you frequently use a personal credit card for business expenses, you can connect your card(s) to Expensify to import purchase details: bank description (usually the merchant name), date, and amount.
- You are responsible for linking your bank account to Expensify to receive reimbursement.
- If you do not connect your personal card, you can add individual charges one at a time to an expense report for reimbursement
If you are a company credit card holder, it is your responsibility to report to the company on the purchases you make with that card.
- Your company credit card will be linked to your Expensify account for you. This will be done once you begin making purchases with it.
- Do not connect your company card yourself, or you will cause duplicate downloads.
- Once the card is linked, Expensify will automatically pull in your credit card charges as they post to your account.
Both reimbursable and non-reimbursable business expenses are grouped together on reports. It is your responsibility to categorize your expenses, add notes, attach receipts, and submit your reports. Some delegate this task to a co-pilot.
Find or Create a Report to Submit
Sign in to Expensify and navigate to the Reports screen
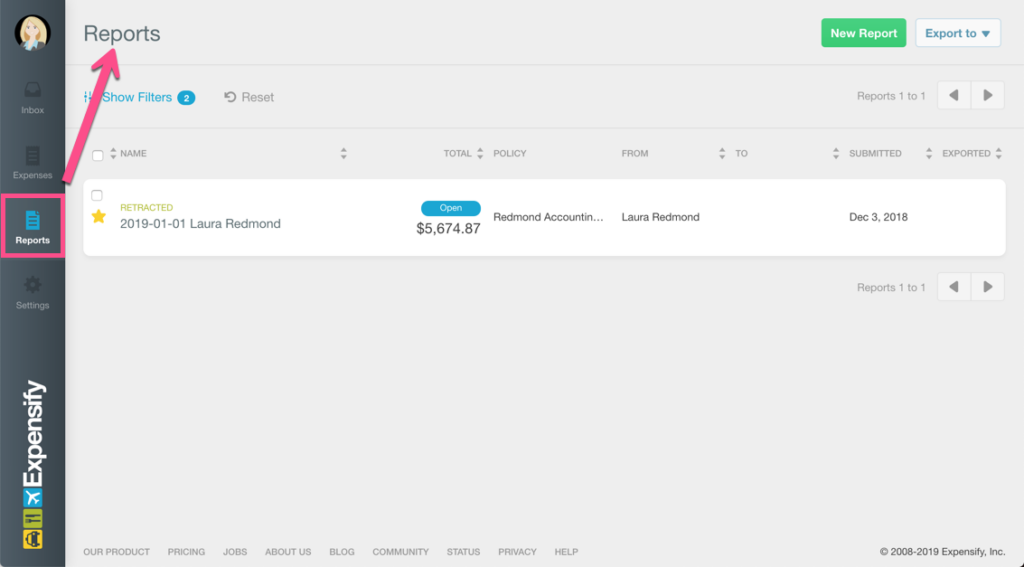
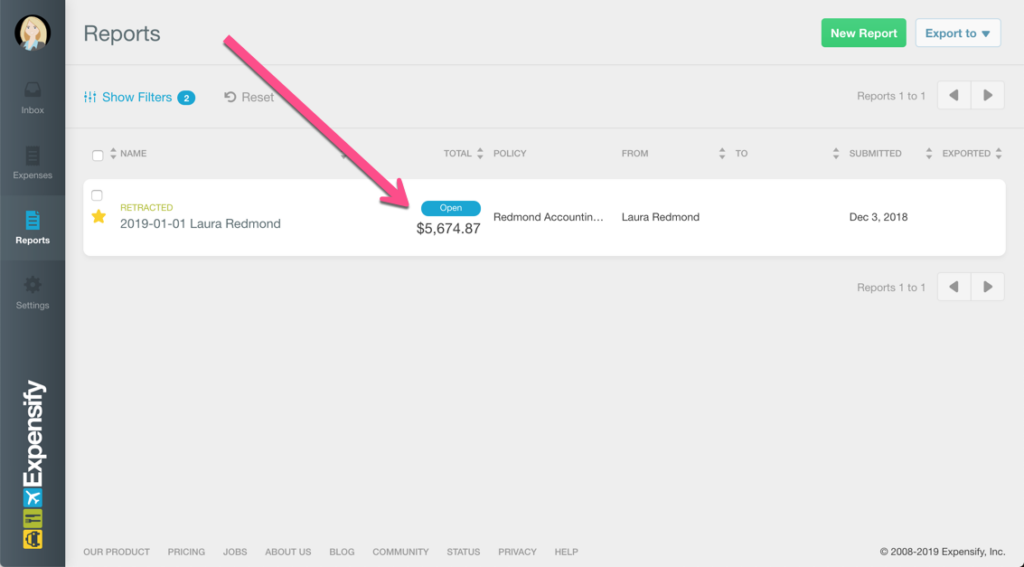
Look for an existing open report that has not yet been submitted. Open reports will have a blue “Open” tag. Click that report row to view the details of the report.
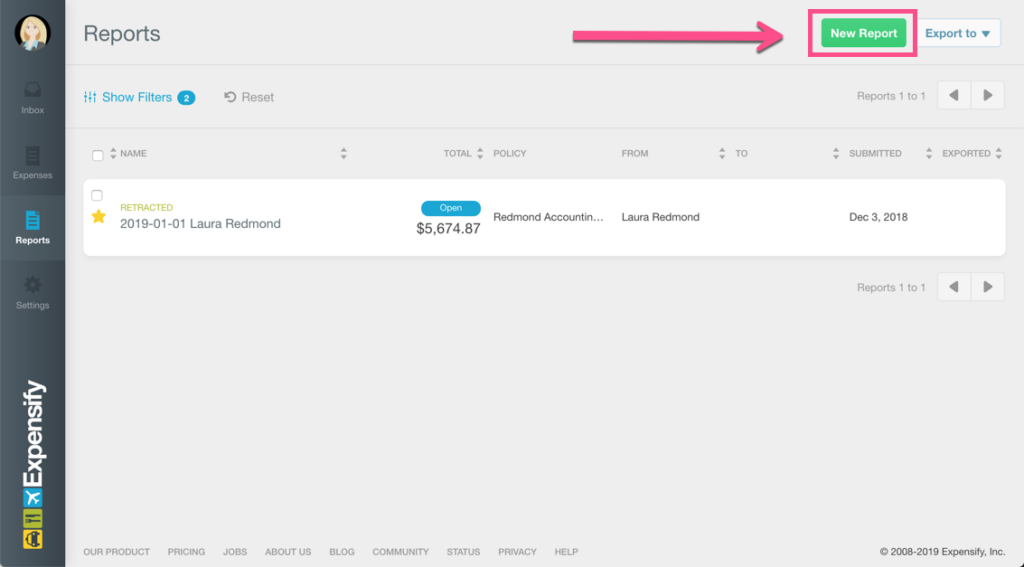
If there is no existing open report, click the New Report button.
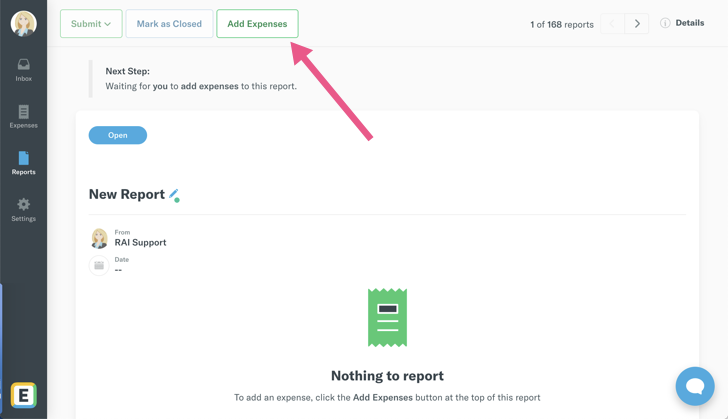
Add expenses
Click the “Add Expenses” button to add expenses to this report.
On the next screen, you will find expenses that are not yet associated with a report. To pull any of these expenses onto this report, click the row for that expense. The expenses listed may include
- Receipts added to Expensify using the mobile app
- Receipts forwarded via email to [email protected] from your email address
- When downloaded from your company credit card
- When downloaded from your personal card
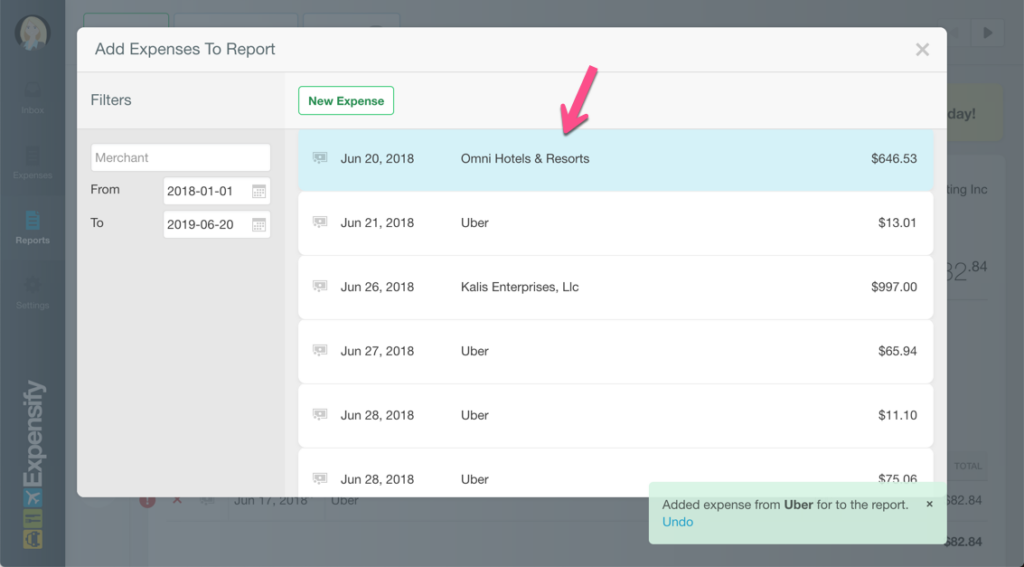
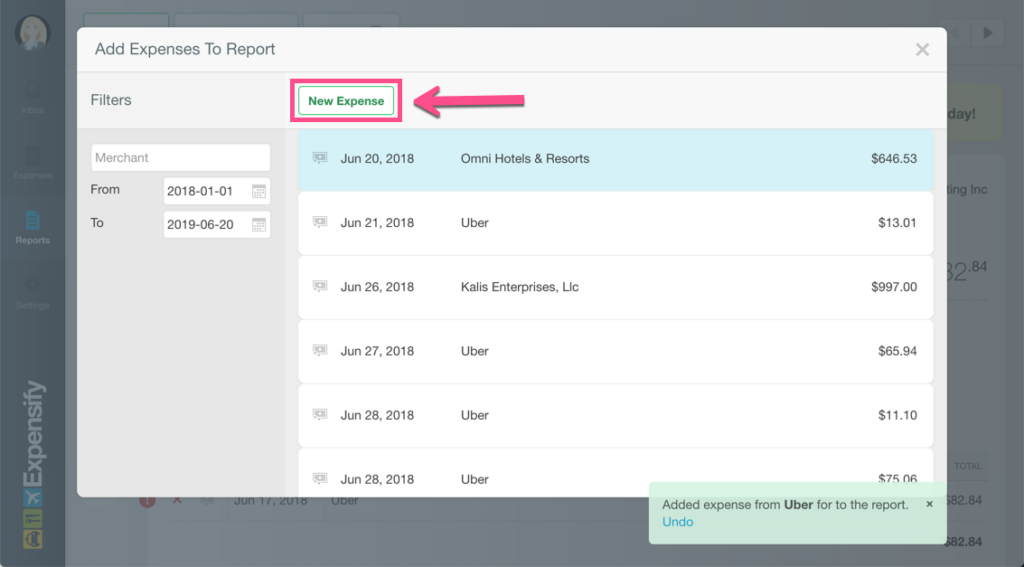
To manually add new expenses, click the New Expense button.
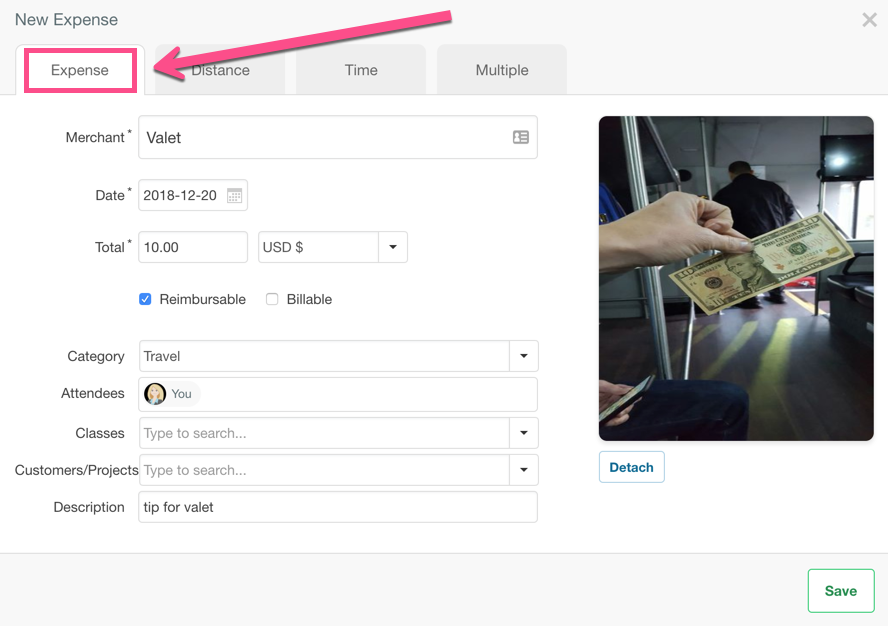
Add Expense Details
On the Expenses tab, you can add details of the expense: merchant, date, amount, etc.
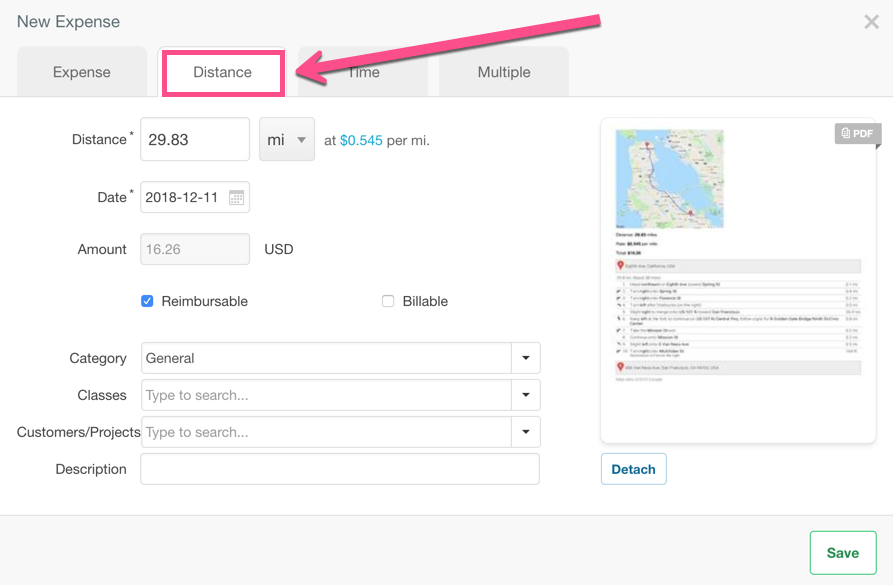
On the Distance tab, you can enter miles driven.
Review Report
Once you’ve added all the expenses to the report, review all expenses, including any that may already have been in the open report. Verify whether the charge is a valid business expense.
You may notice light gray icons on each row. These represent the following:
- The “locked credit card” icon on a line in a report indicates that the activity was downloaded via the company’s centrally managed credit card bank feed. These lines cannot be deleted; however, they can be rejected to remove them from the report if, for instance, they need further details. They should be marked as “not reimbursable” and submitted on a report.
- The “credit card” icon without a lock represents activity that was downloaded to your linked personal credit card and is likely reimbursable.
- The “cash” (dollars & coins) icon represents expenses you entered manually or via a scanned receipt that was not matched to a credit card charge.
- The “automobile” icon represents mileage traveled.
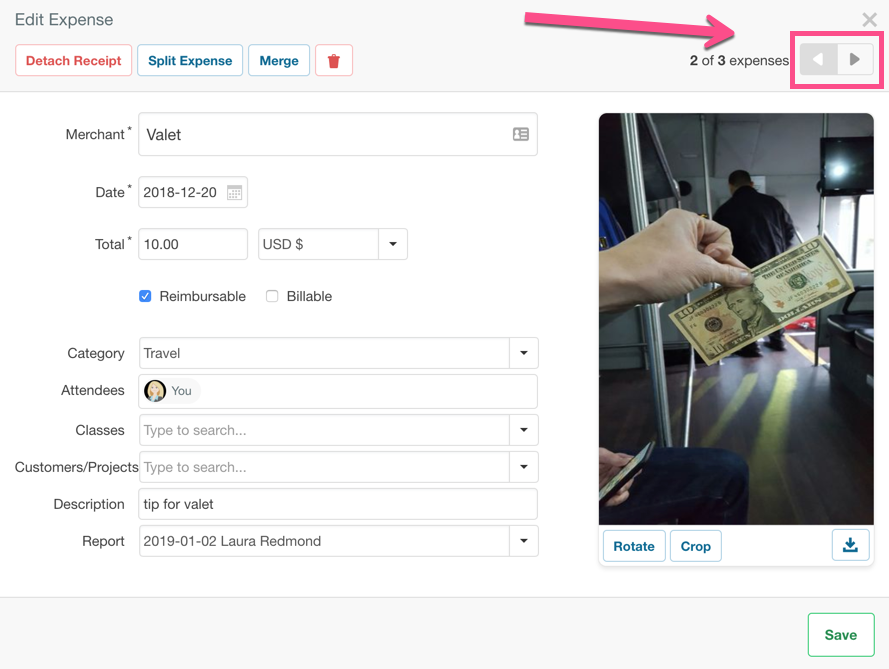
To review the details of each expense on the report in detail, click the expense on the top line of the report and then use the arrows to navigate through each line in the report.
Troubleshooting Your Expense Report
Some things to look for:
- Icons: If you see a cash icon line, it is a receipt for a company credit card purchase. Look for the Merge button and see if it can be merged with another row. You may need to correct the amount on the manually added expense line to match the locked credit card line so that the merge option is shown.
- Reimbursable checkbox: Company credit card charges should always be unchecked; they are not reimbursable to you. All unchecked lines will be treated as company credit card charges. In order to be reimbursed, you must check the box “Reimbursable”
- Category: The category describes the product or service you purchased. If you need to modify, you can do so one at a time, or you can click the Save button to get out of the detail screen, back to the report view, and then use the pencil icon on the left pane of a report to select and edit multiple expenses all at once to assign the same category to multiple expense lines
- Receipt: Supporting documentation in the form of an itemized receipt is required by the IRS on all business expenditures over $75. Expensify will generate a generic text e-receipt for purchases under $75, but the e-receipt is not itemized. The original receipt is preferable; please attach it instead.
- Comments: Further clarify the nature of the business expense by adding memos about the expenditure.
- Rules: Look for the link to create an Expense Rule on individual expenses, so that the next time Expensify sees a purchase from the same merchant, it will code it for you. This greatly increases the automation capability of Expensify
- When you reach the last expense on the report, click the Save button to save any changes and return to the report.
Verify Amounts
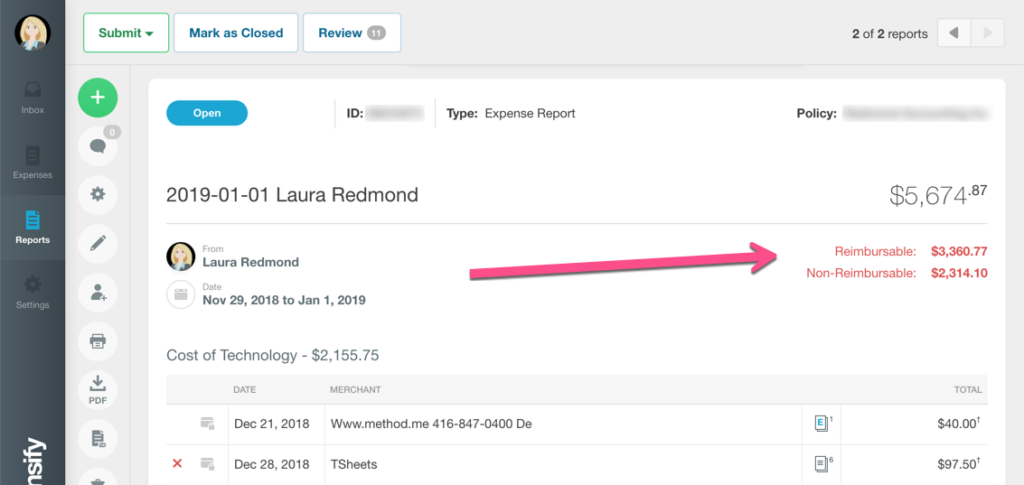
Verify subtotals. Reimbursable and non-reimbursable subtotals are in red below the report total in the upper right corner of a report. Make sure the reimbursable subtotal is the amount you intend to receive payment for.
Fix Errors
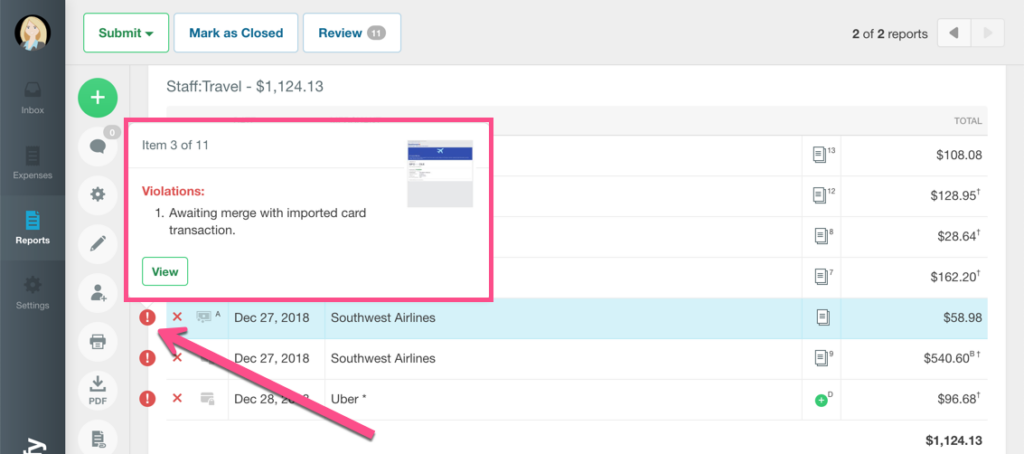
Resolve policy violations. If you see red error messages highlighted in pink, review and correct as needed.
Submit Report
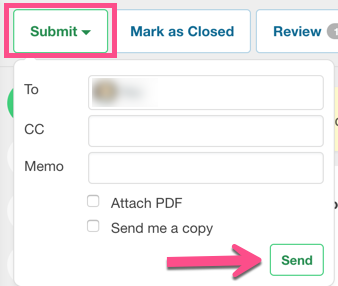
When you click the submit button, it will show you the assigned person to whom you are submitting the report for approval. Confirm that your report is being submitted to the appropriate assigned approver and click the Send button.
When submitting a report for reimbursement, you will be reimbursed electronically. You must set up your bank information in Expensify.
Leave a Reply